Thursday, November 22, 2012

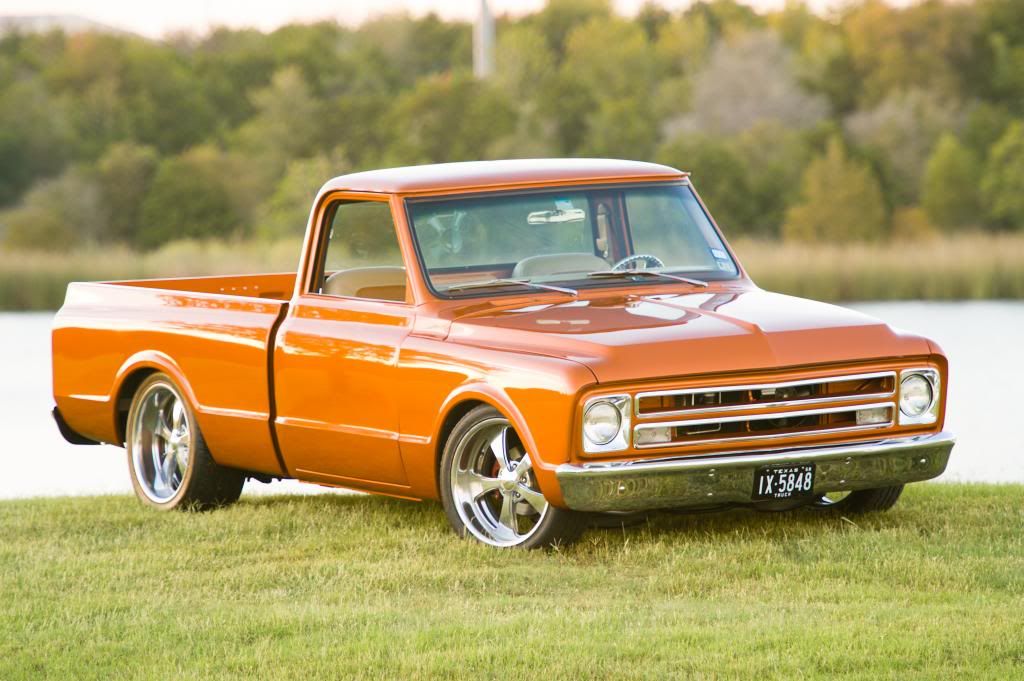
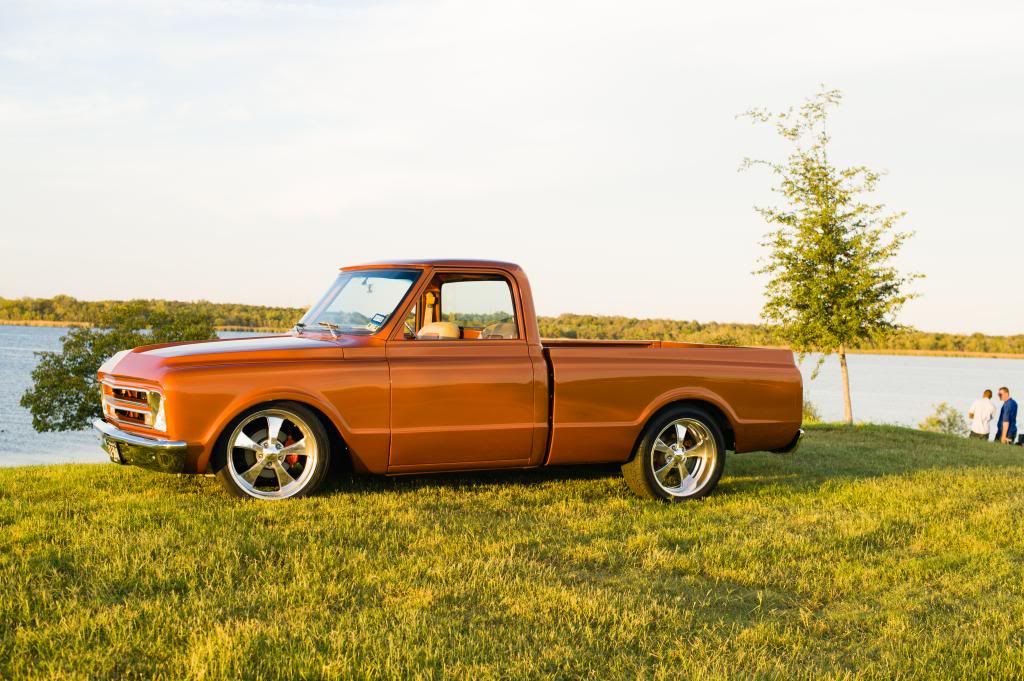
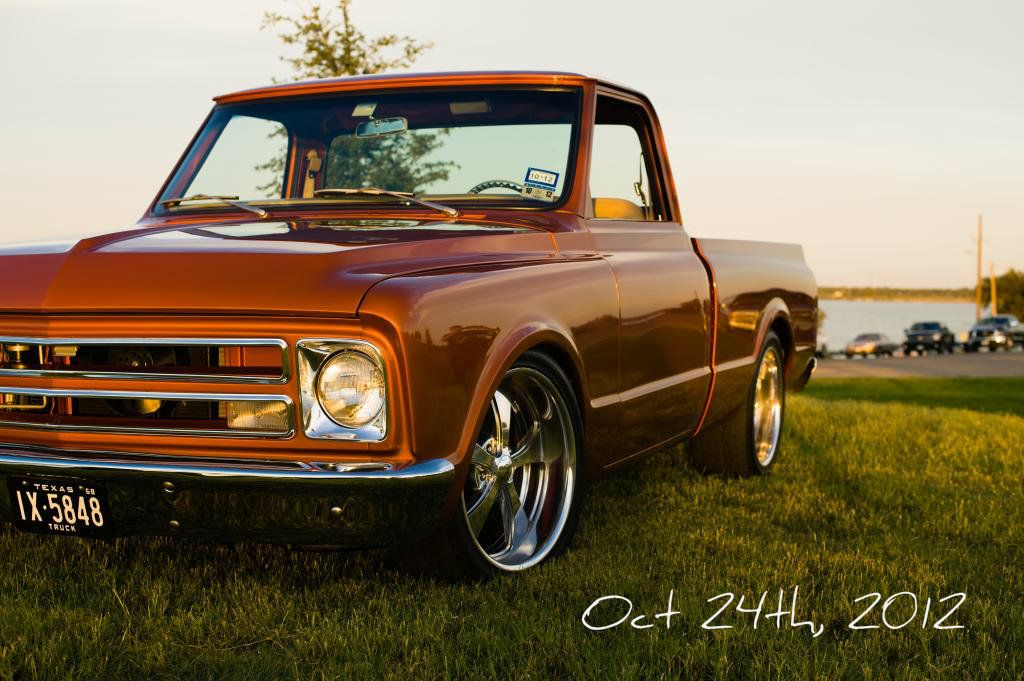
Though I stopped updating this blog I never stopped working on the truck. Below are photos of the finished product.  Since getting her rolling in late 2010, she has won many awards.  In July of 2012 I was approached by Custom Classic Trucks Magazine do to a feature article. The feature should hit newsstands in late 2012.

Wheels are 20" Eagle Alloy model 225.

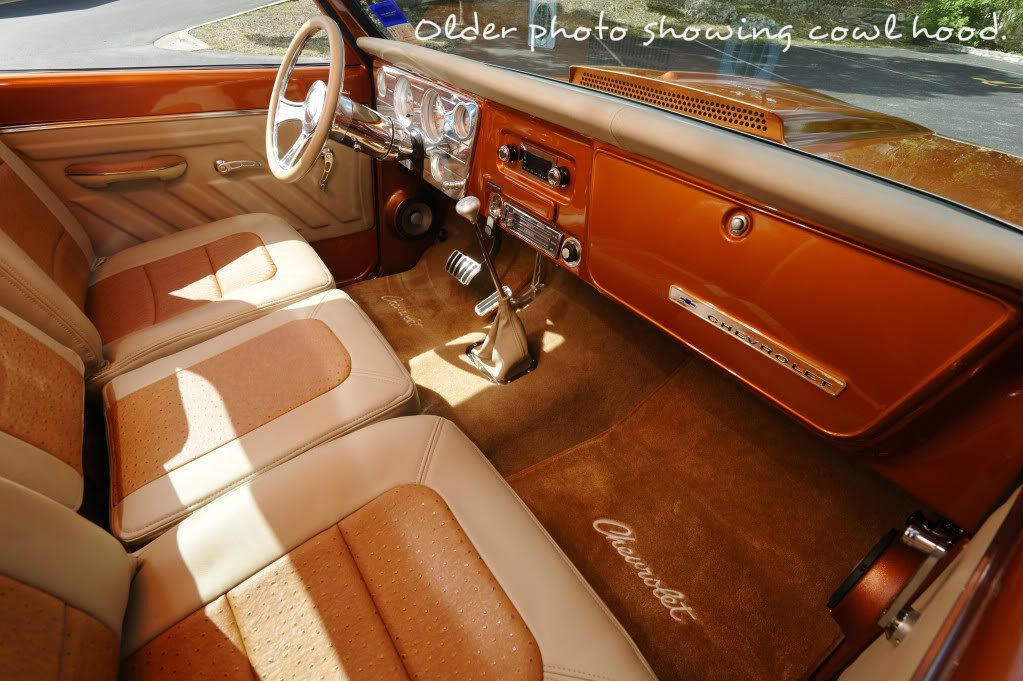
This is one of my favorite interior photos.  Unfortunately it's a bit outdated in that it was taken before the a/c was installed and before I switched back to a stock style hood.

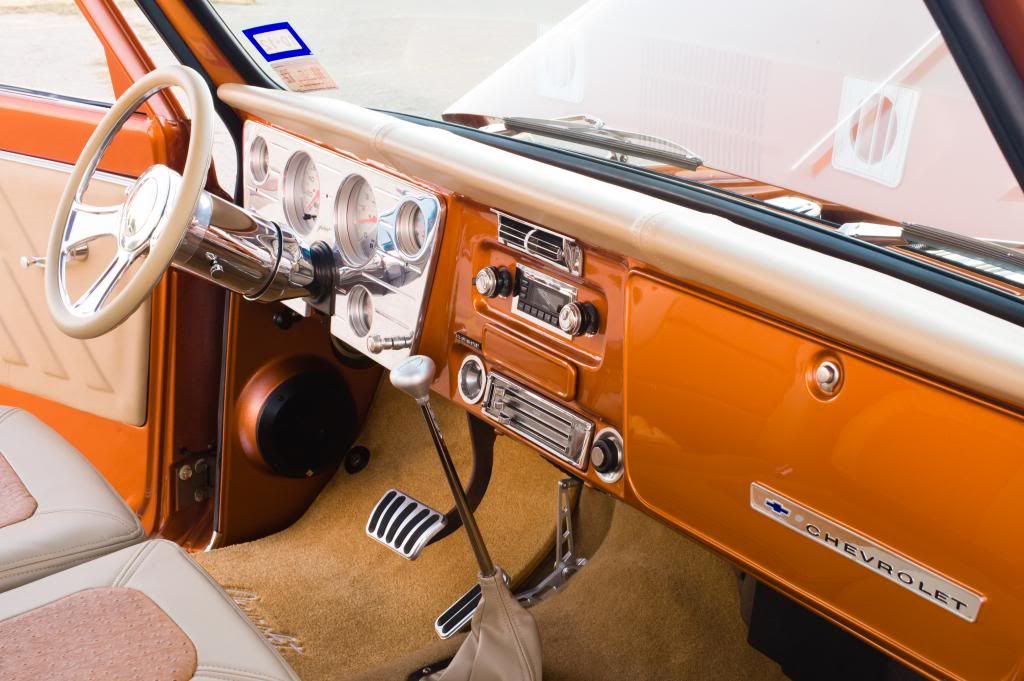
Current look with a/c and stock hood

Rear showing smooth tailgate with handle relocated to the inside. Rear tail lights have a clear lens with bright read LED lights.  The license plate is an original un-issued 1968 Truck plate.   

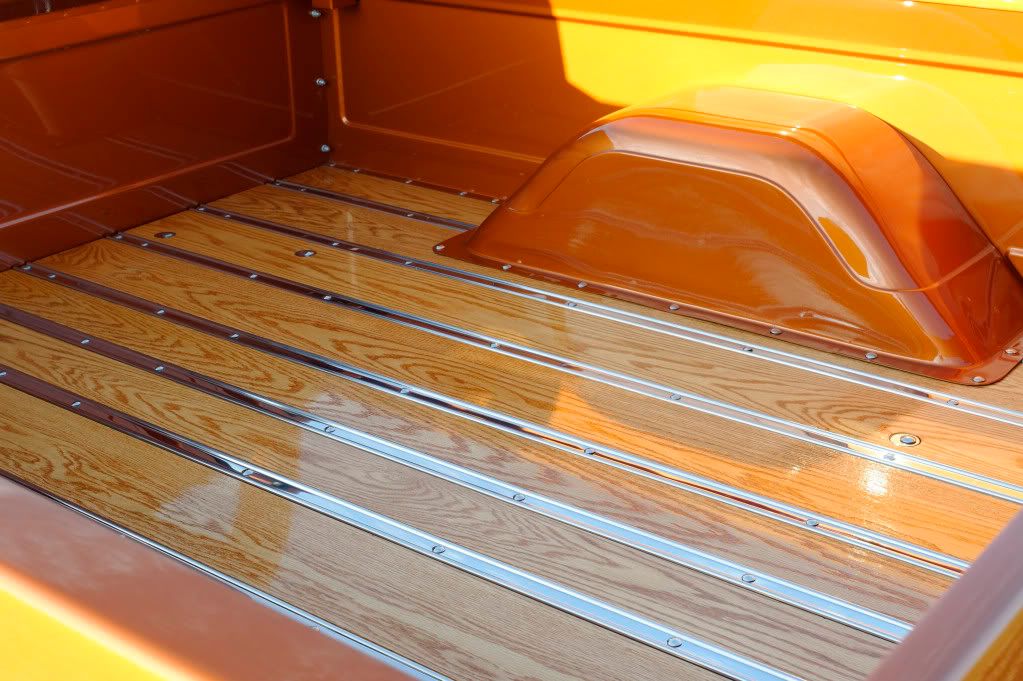
Bed was laid with white oak covered in a pecan stain and finished with marine grade spar varnish. 
The strips are polished stainless steel.  This bed was built from all new parts.  Only the tailgate was used from the original truck.  

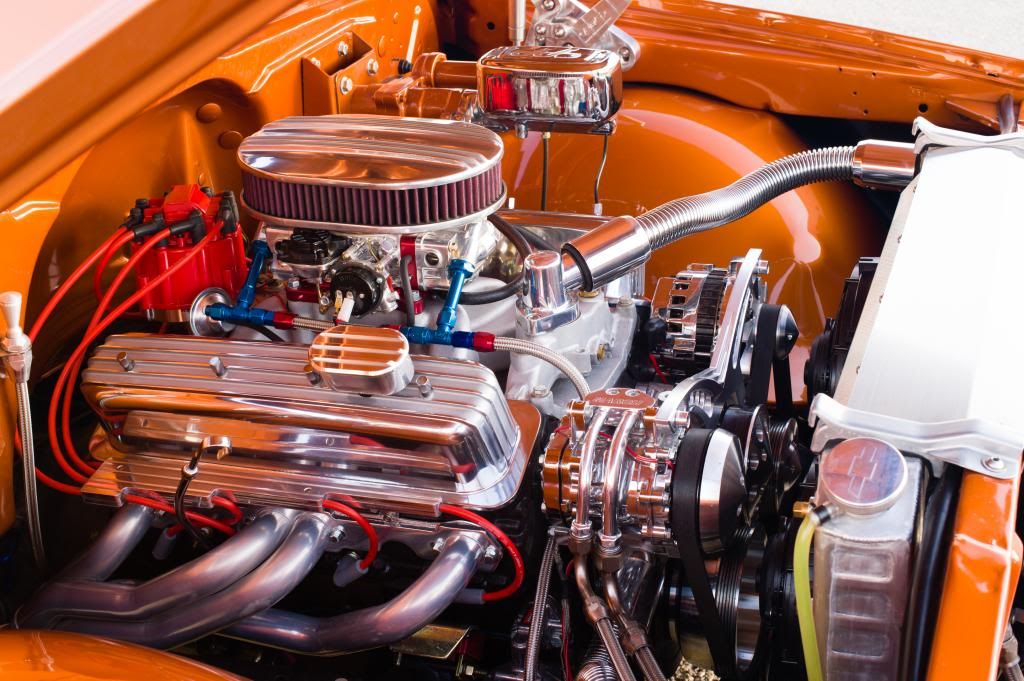
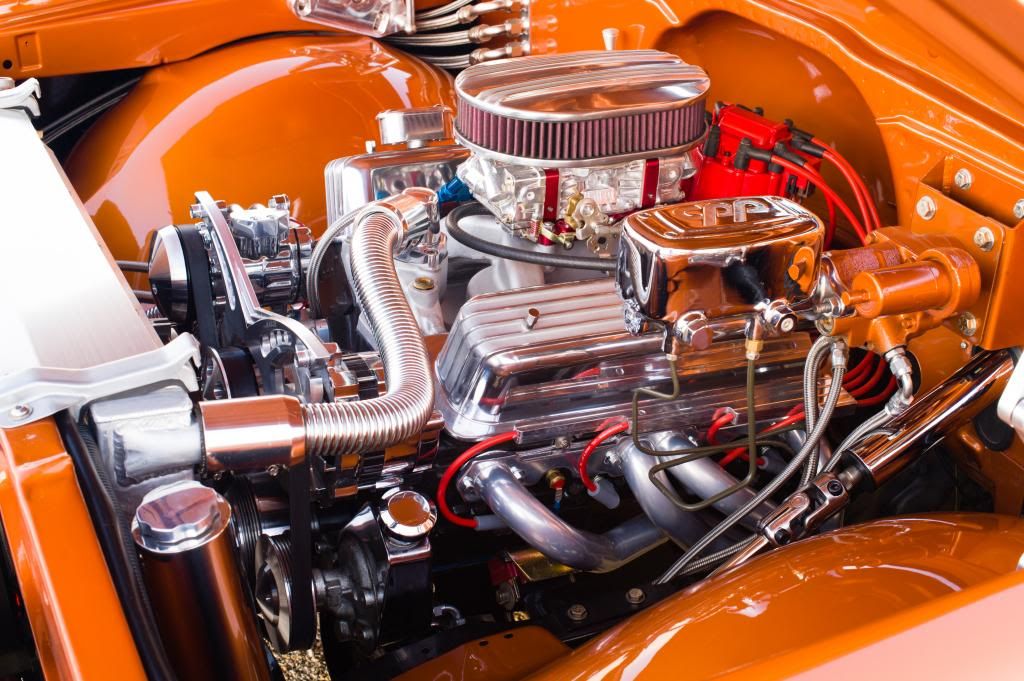
It took three different engines before settling on a dressed out 383 (stroked Chevy 350).  Motor produces a little over 400hp.

This angle shows the hyrdoboost brake booster and a/c plumbing (far side). The brake master cylinder has a built in prop valve which directs fluid to the 4-wheel disc brakes. 

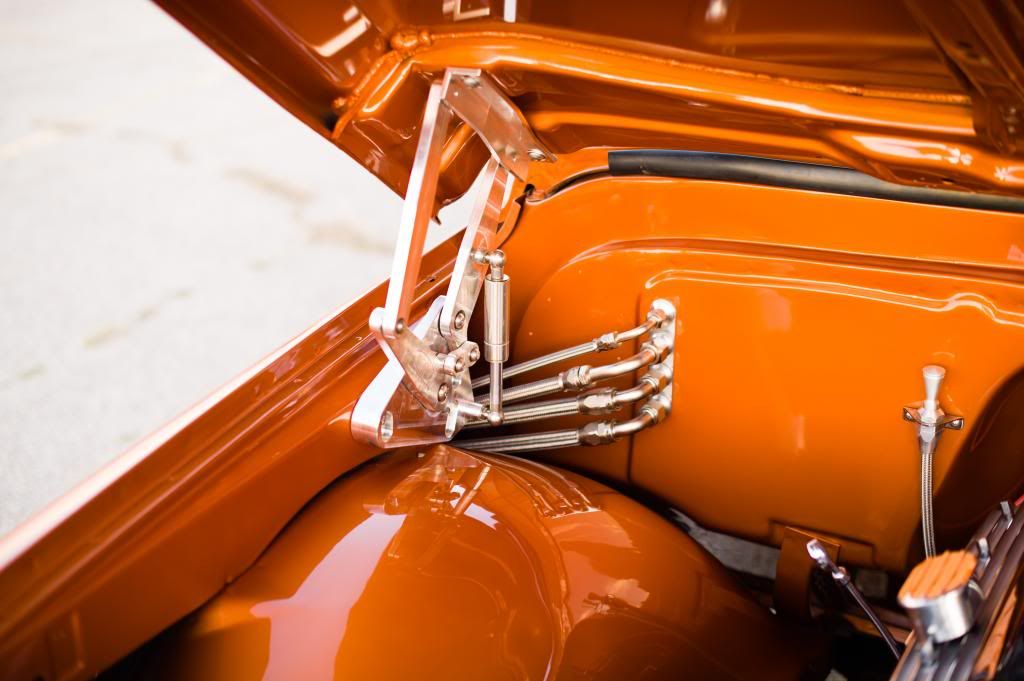
The a/c was the last major modification.  I made all the lines using Aeroquip a/c fittings and hoses.  
A short time later the billet hinges were installed. Pricey but absolutely beautiful!  

Another shot at the lake

I never thought I would get rid of the truck but in late 2012 that's exactly what I did.  Here is a photo of the truck sitting next to the Cobra I purchased to replace it. 

Nine months later I sold the Cobra for $43k.  Now I'm without a classic.  Another will eventually fill the gap.  Until then I will admire others while I search for my next ride.  
Thursday, November 26, 2009

Engine Transmission in the Chassis

As the cab gets worked over by Jason, I focused on getting the motor and transmission lowered onto the chassis.

I had a problem locating early style big block truck mounts. The ones I did find were outrageously priced. I later found a nice set of tubular mounts on Ebay. The mounts use existing frame holes and were a snap to install. I also picked up a CPP transmission crossmember. It bolts to the lower part of the frame and allows the exhaust to be routed between the frame rails. This is a must for lowered trucks! In place of the old 400 tranny woulb be a 700R4. The new tranny has the benefit of overdrive and was built to hold 550 hp. Between the tranny and motor is a Rev Maxx 3000 RPM stall converter. A great match for the 304HR cam.

The motor was lowered into the chasis as a shortblock without the transmission. I could have joined the two before but decided to wait. The motor went it easy and the motor mounts were a perfect fit.

Before installing the transmission I needed to seat the stall converter. This proved to be a problem. After several hours I gave up. I called Rev Maxx the next day for help. I was told to return the converter to be resplined. Apparently they had a batch of converters get created with oversized input shafts. Drats! I promptly returned the converter and I am currently waiting for its return. In the meantime I put the transmission in place to help support the motor.

Look at the difference between the stock tranny crossmember on the right versus the new tubular replacement
From Tranny Mount

From Engine and Tranny

The 454 in its final resting place
From Engine and Tranny

Tubular motor mounts
From Engine and Tranny

Body Work Begins at DJ Customs

My newly acquired cab has been lounging in the back of my garage while I focus on getting the engine and tranny in place. Rather than wait to finish, I contacted Jason at DJ Customs in Cedar Park to start on the body work. Jason has years of experience doing custom paint and body along with bagged suspensions.

With the help of my brother Roger, the cab was trailered to DJ Customs. The plan was to have the cab soda blasted to remove any rust, dirt and paint. Jason would then begin the repairs. The inside cab floor and outside bottom would be sprayed with POR15. The rest of the interior with expoxy primer. The outside cab would have all dents removed then get sprayed with expoxy primer.

Here are pics midway thru the work

Before soda blasting
From Cab Work Begins

After soda blasting. Amazing results!
From

Soda blasted firewall
From Cab Work Begins

Blasted firewall
From Cab Work Begins

Interior of cab with floor coated and interior primered
From Cab Work Begins

From Cab Work Begins

Going Full Roller!!

From the very beginning I knew I wanted a roller cam motor. When I purchased the 454 it already came with a nice 292 flat tappet cam. There was no need to change it so I decided to keep it. Once I realized I had to flycut the pistons, I decided to go whole-hog and go full roller. I pulled the Comp 292H cam and replaced it with a very stout Comp 304HR roller cam. The diferrence in duration at .o5o was nominal but the lift in the roller was .612 versus .550 in the 292H. Going roller meant getting roller lifters and a roller timing chain with thrust washer. All Comp Cam products. This added quite a bit more to the cost but got me what I always wanted :)

Comp Ultra Pro Magnum Rockers and Roller Lifters
From Engine and Tranny

Comp 304HR Roller Cam
From Engine and Tranny

Swapping out Cabs

Several posts back I documented the rusts repairs to my 68' cab. I completed most of the passenger side and still had the driver side and firewall to repair. At that time I chose to focus on the suspension and engine work. As I prepared to startup work on the cab, I came across a rust free 70' cab for sale in Waco which is 1 1/2hrs north of Austin. The cab was being offered with the doors and a very nice cab dolley. I knew getting that cab would save me tons of time so I contacted the owner and made a deal. It would be a couple days before I could leave to pick it up. In the meantime I sold my current cab to my friend Calvin. He also took my original long bed. The sale made purchasing the new cab a no-brainer!

Pics of the new cab
From Cab Work Begins
Here you can see the ventilation holes were blocked to smoot the firewall
From Cab Work Begins
Cab corner had been replaced. Nicely done.
From Cab Work Begins

Flycutting Time!!

I will begin by saying I didn't take any pics during the flycutting process. Mainly because it was a very labor intensive process. In hindsight I hate that I failed to document the work. I'm sure others would have benefitted from my experience.

Total time from start to end took a good 9 hrs. The first piston took the longest. From there you have a bench mark for completing the others. I got a little faster with each piston. On piston number 6 I bent the cutting shaft and nearly trashed a piston. I called Dave and he promptly send out a new shaft free of charge.

A week later I was back to cutting pistons. It didn't take me long to cut the final 3 pistons. Boy was I happy that was over!! Here is a pic of a finished piston.

From Piston Valve Clearance

Cutting edges were hit with sandpaper to remove sharp edges and prevent stress risers
From Piston Valve Clearance

Lindy Tools In-Head Piston Cutter

Now that I have decided to flycut the pistons I had to get the proper tools to do the job. I needed a cutting tool that can be used while the pistons were still in the block. I heard Isky Cams made such a cutter so I gave them a call. I was suprised to hear they were 3 months on back order! I then turned to Lindy Tools in Waukegan, IL. They produce an in-head cutter that creates both dept and radial clearance and is superior to the Isky cutter.

When I called Lindy I was suprised the owner, Dave, answered the phone. I explained what I needed and he assured me he had the proper cutter. He also gave me some history around the Isky cutter and why they were not available. At the time I was unsure but felt I had no other choice. I ordered his cutter for half the price of the Isky one.

The Lindy cutters are made to order so it took two weeks to arrive. When it came in I was impressed with the quality of the cutter. Happy with my purchase I started laying out plans to cut the pistons. The process would take over eight hours to complete so I wanted to have everthing right.

Lindy Tools Cutter Size 2.375
From Piston Valve Clearance

From Piston Valve Clearance